
Tutorial
Planning a four lane Ninco club track. Part 2
Having set up our room layout, we can now move onto the track design itself.
It may seem obvious but the first step in the process is to stop and think about what sort of track you want. For our club members there were several requirements which were agreed...
- Four lanes
- A figure of eight layout, so that all lanes were equal in length
- A long straight
- A tight hairpin at one end of the straight
- A wide, sweeping corner at the other end of the straight
- A tight, technical section with a variety of corners
Let's lay some track
![]() So starting from where we left off in part 1, we can use the Fit to selection tool to zoom in on our working space. Click the tool then draw a rectangle around the track space in the middle of the room.
So starting from where we left off in part 1, we can use the Fit to selection tool to zoom in on our working space. Click the tool then draw a rectangle around the track space in the middle of the room.

Next we'll start laying our track by adding a long straight.
We've already got the Ninco library toolbar loaded, so if we hover over the 4 lane straight tab we'll see the track options available.

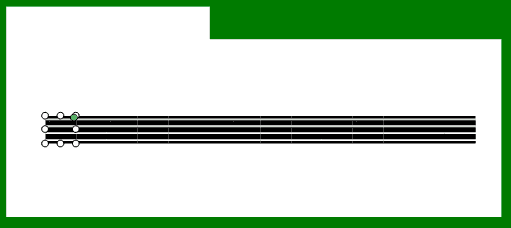
So let's start by simply clicking enough times on the 2xStraight library button to fill the space we've got with straight pieces.
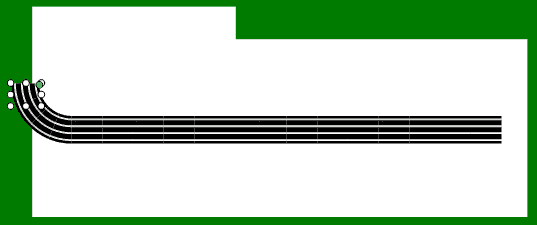
Then let's add in our long sweeping corner, using the 4 lane curves tab, it doesn't matter that we've gone over the edge of our space for now.
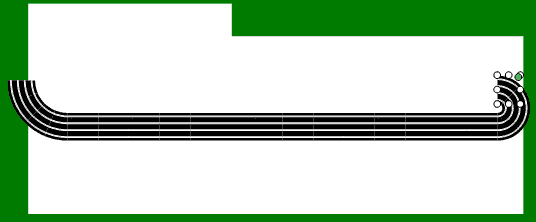
Next we'll add a tight hairpin at the other end of the track.
![]() We'll need to select the straight on the far right and click on the Reverse track direction button to do this, as track pieces are added in the direction of the track, which is currently going to the left.
We'll need to select the straight on the far right and click on the Reverse track direction button to do this, as track pieces are added in the direction of the track, which is currently going to the left.
![]() You can click on the Show track direction button if you want, or you can see where new pieces will be added by hovering over a track piece in the library toolbar.
You can click on the Show track direction button if you want, or you can see where new pieces will be added by hovering over a track piece in the library toolbar.
Add borders and trim length
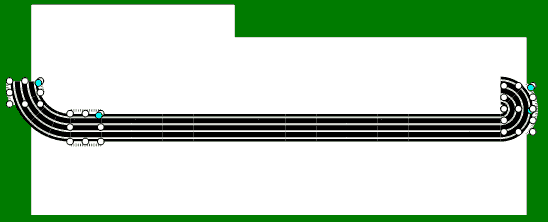
Now we'll trim that section to the length of the space we have, but before we do, we'll add some outside borders so we know we have space for them.
![]()
![]() Shift click on several strategically placed track sections, then click on the left and right border buttons to add the borders
Shift click on several strategically placed track sections, then click on the left and right border buttons to add the borders
![]()
![]() Now we can trim the length by using either the Delete or Replace track section tools.
Now we can trim the length by using either the Delete or Replace track section tools.
![]() We can then move the whole section into place using the Move as group tool
We can then move the whole section into place using the Move as group tool
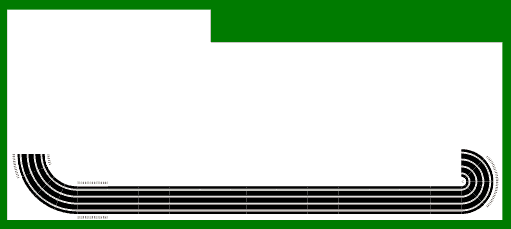
Building up the layout
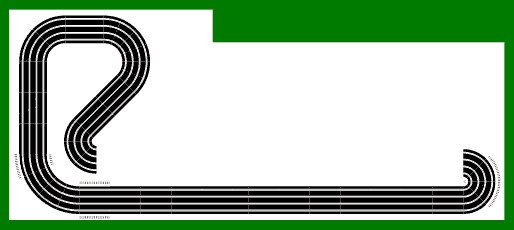
Next we'll move to the left hand end of the layout to add some more track.
![]() We'll need to select the last corner on the left and click on the Reverse track direction button so we're adding track in the right direction.
We'll need to select the last corner on the left and click on the Reverse track direction button so we're adding track in the right direction.
With a little trial and error, we end up with something we're happy with.
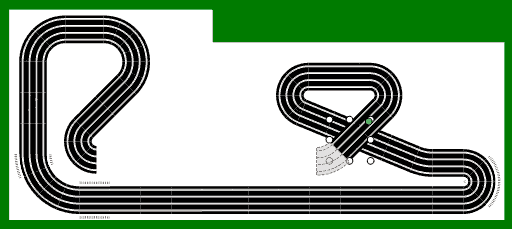
Now we do the same thing at the right hand end, where we're thinking of adding the loop for the figure of eight.
Again some trial and error is involved, before we're happy with the result.
Finishing and joining up the layout
Finally, we can add the last part of our layout.
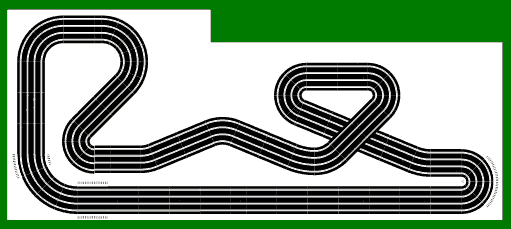
This is often the most difficult part to work out, because we have to make sure it joins up. Here we've had to experiment with all three corners on the last section to get a satisfactory result.
![]() If your track layout doesn't quite join, you can use the Gap suppressor tool. Most plastic track will allow a certain amount of adjustment and the gap suppressor will mimic that and close small gaps.
If your track layout doesn't quite join, you can use the Gap suppressor tool. Most plastic track will allow a certain amount of adjustment and the gap suppressor will mimic that and close small gaps.
Adding borders
![]()
![]() We want to add borders on the outside of all corners using the Left and Right Border tools. There are three ways we could do this.
We want to add borders on the outside of all corners using the Left and Right Border tools. There are three ways we could do this.
- We could do it one track piece at a time, by selecting each piece and clicking the appropriate border button.
- We could select all the right hand corners by shift clicking each one, then add the borders. Then repeat for the left hand corners.
But on this occasion we're going to select all the track pieces, add borders, then delete any that we don't want.
![]() First we click on the Object layer tool which will hide everything but the track itself.
First we click on the Object layer tool which will hide everything but the track itself.
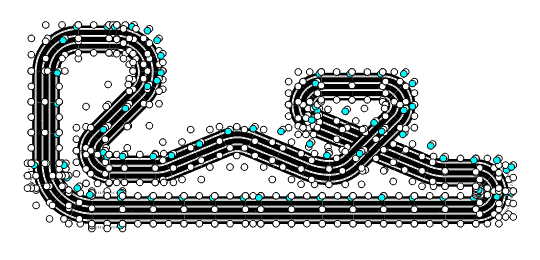
![]() We can then select all track pieces by drawing a rectangle around them with the Selection tool or by pressing Ctrl + A on the keyboard.
We can then select all track pieces by drawing a rectangle around them with the Selection tool or by pressing Ctrl + A on the keyboard.
![]()
![]() Now we can click on the Left and Right Border tools to add borders to the whole track.
Now we can click on the Left and Right Border tools to add borders to the whole track.
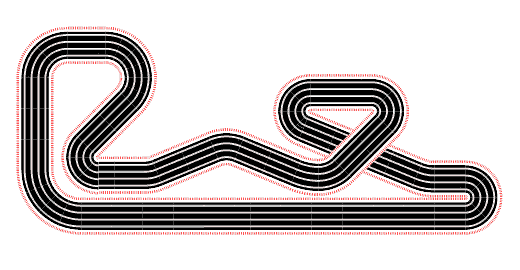
Then we can delete any borders we don't need.
We'll save the track layout with a new name so that our original room layout remains intact as a starting point for alternative layout designs.
In the next part we'll add a table, some text, lane colours and driver positions.